Thread parameters in EO systems
Screw thread: often shortened to thread, is a helical structure used to convert between rotational and linear movement or force.
1. Classification of threads
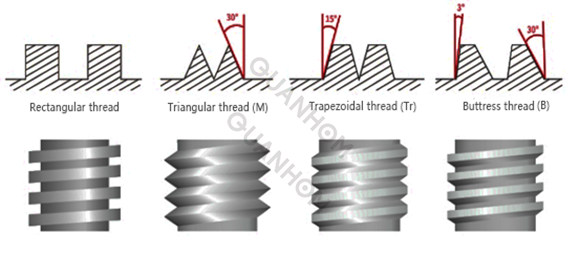
1.1 Basic profile: rectangular thread、triangular thread/ machine screw thread(M)、trapezoidal thread(Tr)、buttress thread(B)
1.2 Rotation direction: left-hand screw threads (LH) and right-hand screw threads (if LH is not specified, default is right-handed thread.)
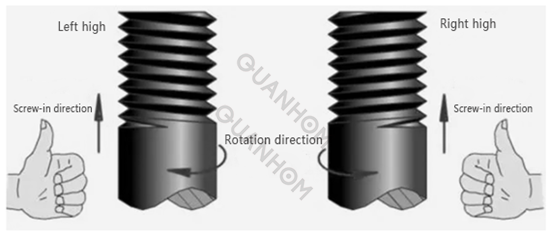
Left-hand screw threads
Right-hand screw threads
1.3 Number of helix: single-start thread, multi-start thread. Single- start threads have a self-locking capability due to their smaller lead angle (not easy to slide) and are used for fixed locking; while multi- start threads are used to transmit power and motion due to their larger lead angle (easy to slide).
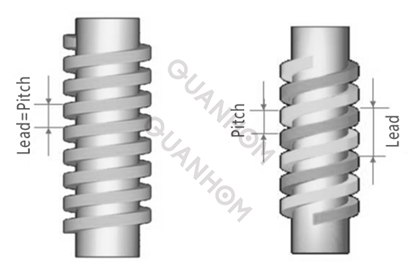
Single-start thread
Multi-start thread
1.4 The internal and external surfaces of the solid of revolution: internal thread and external thread.
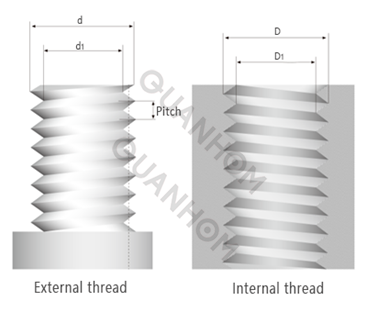
1.5 The function of the spiral: connection thread (triangular thread/ machine screw thread, pipe thread), transmission thread (rectangular thread, trapezoidal thread (Tr), buttress thread(B).
1.6 The shape of the parent body: parallel screw thread、taper screw thread (taper screw thread is mainly used for pipe connection).
2. Parameters of the thread
Basic parameters of the thread:
D: basic major diameter (nominal diameter) of internal thread
d: basic major diameter (nominal diameter) of external thread
D1 : basic minor diameter of internal thread
d1: basic minor diameter of external thread
D2 : basic pitch diameter of internal thread
d2: basic pitch diameter of external thread
P: pitch
Ph : lead
H: fundamental triangle height
T: tolerance
TD1 : internal thread minor diameter tolerance
Td: external thread major diameter tolerance
EI, ei: lower deviation
ES, es: upper deviation
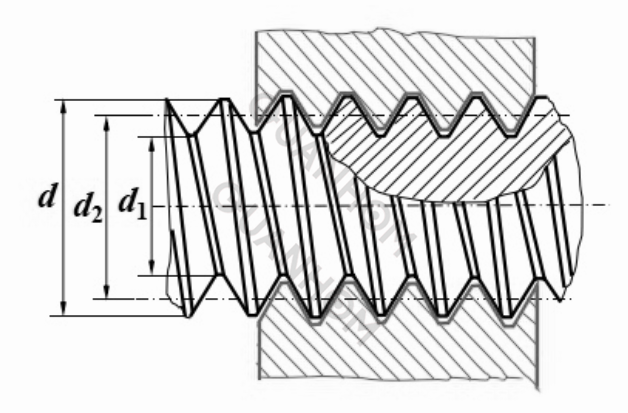
The most important ones are three- diameter and two-distance.
2.1 Three-diameter
d: major diameter is the nominal diameter in the standard
d1: minor diameter is commonly used as the calculated diameter for the dangerous cross section of a screw in strength calculations.
d2: pitch diameter is the diameter of an imaginary cylinder passing through the equal width of the groove and the protrusion on the profile in the axial section of the thread. It is the diameter that determines the geometrical parameters of the thread and the properties of the fit.
2.2 Two-distance.
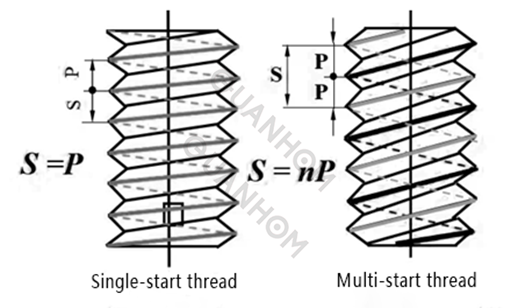
P: Pitch
S: Stroke
3. Common marking methods for threads in opto-mechanical systems
The marking of machine screw thread consists of five parts:

3.1 Feature designation
M (machine screw thread), G (Guan-general name for pipe thread), Tr (trapezoidal thread), B (buttress thread).
3.2 Size designation
Marking: nominal diameter× pitch (For multi-start threads, both lead and pitch need to be marked. For single-start coarse threads, the pitch is not marked). These values are documented in the national standard thread table and can be found online.
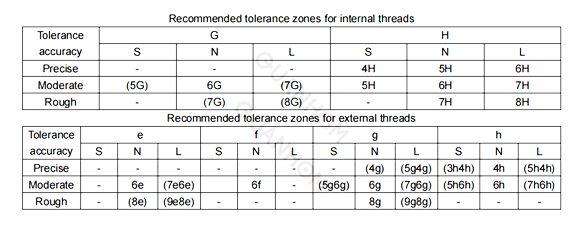
3.3 Tolerance zone designation
The tolerance zone is composed of tolerance grade (numeric) and basic deviation(indicated by lowercase letters for external threads and uppercase letters for internal threads), for example: 5g6g、6g、6H、7H.
When the pitch diameter tolerance zone and the crest diameter tolerance zone have different designations, they need to be noted separately, such as: M10-5g6g. If they are the same, mark one. The smaller the number in the same tolerance zone, the more precise it is.
3.4 Screwing length designation
S(short): short screwing length thread
L(length): long screwing length thread
N(normal): medium screwing length thread
When the thread has a medium screwing length, N (normal) is not marked. In case of special requirements, the value of screwing length can be indicated.
3.5 Rotation direction designation
Left-hand screw threads are marked LH, right-hand screw threads is not marked.
4. Infrared lens thread application
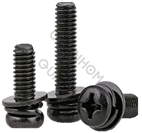
Fastening
Choose appropriate flat washers and spring washers based on the operating environment.
Depending on the disassembly requirements, coordinate with suitable thread adhesive.
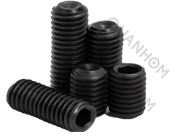
Positioning
Optional pointed head/ flat head/ round head, etc.
Destructive positioning

Lens interface threads
pitch 0.5/ 0.75/ 1
Here are several example for better understanding. Let’s take a look the threads of Quanhom infrared lenses.
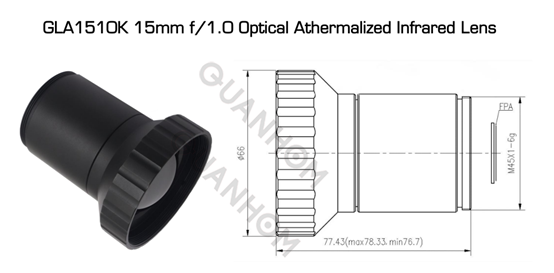
Eg: M45X1-6g
Machine screw thread
Nominal diameter:45mm
Pitch:1mm (machine fine thread)
Tolerance grade: 6 (the pitch diameter tolerance zone and the crest diameter tolerance zone have the same grade.)
External thread: g
Medium screwing length: N (not marked)
Rotation direction: right-hand (not marked)
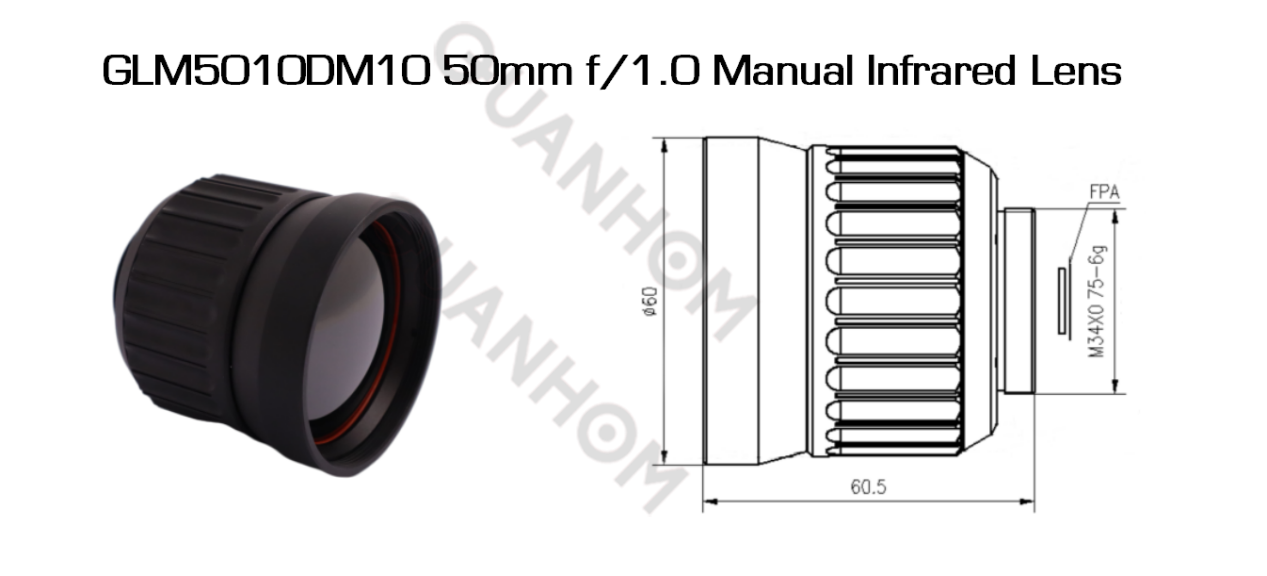
Eg: M34X0.75-6g
Machine screw thread
Nominal diameter:34mm
Pitch:0.75 mm (machine fine thread)
Tolerance grade: 6 (the pitch diameter tolerance zone and the crest diameter tolerance zone have the same grade.)
External thread: g
Medium screwing length: N (not marked)
Rotation direction: right-hand (not marked)
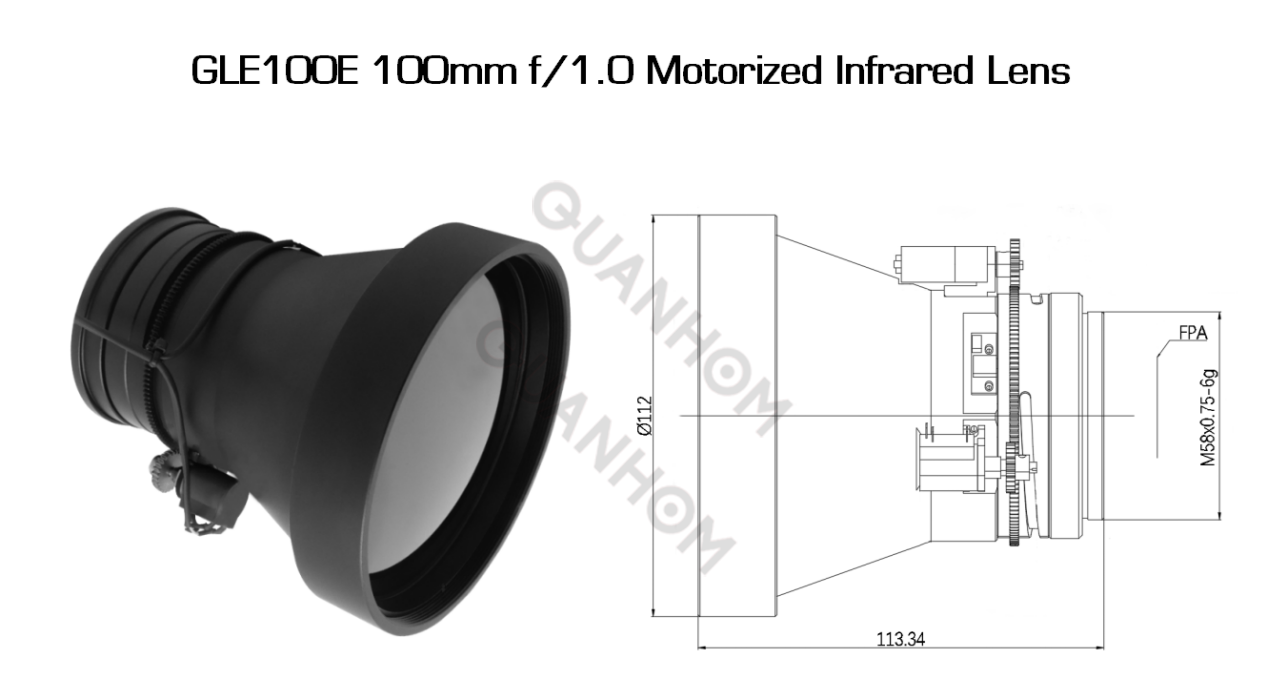
Eg: M58X0.75-6g
Machine screw thread
Nominal diameter:58mm
Pitch:0.75 mm (machine fine thread)
Tolerance grade: 6 (the pitch diameter tolerance zone and the crest diameter tolerance zone have the same grade.)
External thread: g
Medium screwing length: N (not marked)
Rotation direction: right-hand (not marked)

